- Rajdhani Components Pvt. Ltd., Is certified with as ISO 9001-2008.
- We committed in maximizing customer satisfaction by providing highest quality of products and services forever.
- Quality which will be continued to be defined by the our customer will request to use of quality tools and more cost effective improvements and solutions. Quality maintained by preventing defects, measure trend of quality and implementing advance action observed value crossing the limits.
- Behind the concept of automation lines is to give the Best quality of cages to customer at affordable prices.
- Rajdhani Components Pvt. Ltd. places a great improvement in the process of Quality system and its implementation to achieve the goal of Zero Defect Products.
- We are mainly Focusing on the Customer Satisfaction in term of Quality & Quantity & On time Delivery.
- Rajdhani Components Pvt. Ltd., has established the best inspection system from their 18 years experience in cage making.
- First piece inspection and in process inspection report are regularly filled at defined frequency.
- Inspection methods are established to inspect the cage parameters.
- TPM check sheet prepared in order to keep machine in good condition and take quality production for long times.
- Control Plan is been prepared in order to monitor the process.
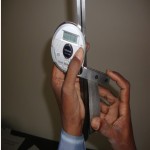
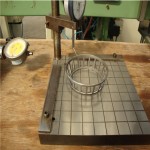
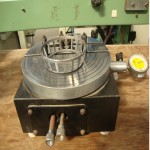
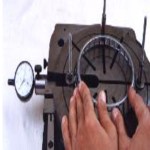
- We have following measuring instrument for inspection of cage
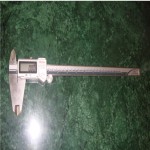
- Digital Vernier Calliper -(Mitutoyo Make)
- Dial Calilper- (Mitutoyo Make)
- Digital Bevel Protector -(Mitutoyo Make)
- Dial Gauges-(Mitutoyo and Baker Make)
- Slip Gauge Set (Zero Grade) –(Mitutoyo Make)
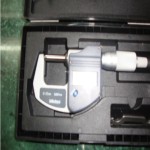
- Digital Micrometer -(Mitutoyo Make)
- Indexing Error checking Gauge
- Wing Shake checking Gauge
- Comparator Stand
Instruments are listed in order of use for blank, draw & center hole punching station
| Sr.No. | Characteristic | Measuring Instrument / Gauge To Be Used | Instrument / Gauge Specification | |
| Range | Least Count | |||
| 1.1 | R. M. Strip Width | Digital Caliper | 0 –150 / 0 – 200 / 0 – 300 mm | 0.01 mm |
| 1.2 | R. M. Thickness | External Micrometer with Pointed / Plain Anvil | 0-25 mm | 0.01 / 0.001 mm |
| 1.3 | Width(Only for Ref.) | Digital Caliper | 0 –150 / 0 – 200 / 0 – 300 mm | 0.01 mm |
| 1.4 | Cup Angle | Universal Bevel protractor | 0 –360 º | 5’ |
| Surface Plate | Grade : 0 | |||
| or | ||||
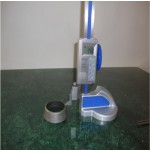
| 1.5 | Cup Height (Minimum) | Vernier Height Gauge with Carbide Scribe | 0-300 mm | 0.02 mm |
| Surface Plate | Grade : 0 | |||
| 1.6 | Cup Diameter Master | Special Comparator | Rajdhani Design | |
| Dial Indicator | 0 – 10 mm | 0.01 mm | ||
| 1.7 | Setting Height For Cup O.D. | |||
| 1.8 | Cup Radius Arc At Bottom must lie within | Vernier Height Gauge with Carbide Scriber | 0-300 mm | 0.02 mm |
| Surface Plate | Grade : 0 | |||
| 1.9 | Center Hole Punching | Digital Caliper | 0 –150 / 0 – 200 / 0 – 300 mm | 0.01 mm |
| 1.10 | Eccentricity (of S.E. O.D. w.r.t. Cage Bore) | Eccentricity Checking Gauge | Rajdhani Design | |
| Dial Indicator | 0 – 10 mm | 0.01 mm | ||
| 1.11 | Visual Checks | Visually | - | |
Instruments are listed in order of use for facing station
| Sr.No. | Characteristic | Measuring Instrument / Gauge To Be Used | Instrument / Gauge Specification | |
| Range | Least Count | |||
| 2.1 | Cup Finish Height | Comparator Stand | Rajdhani Design | |
| Dial Indicator | 0.10 mm | 0.01 mm | ||
| Slip Gauge Box | Grade : 0 | |||
| 2.2 | Radius At Top | Visual | - | |
| 2.3 | Cup Diameter At Top / O.D. (L.E.) | Digital Vernier Caliper | 0 –150 / 0 – 200 / 0 – 300 mm | 0.01 mm |
| 2.4 | Face Parallelism | Parallel Indicator Gauge | ||
| Dial Indicator | 0 – 10 mm | 0.01 mm | ||
| 2.6 | Visual Checks | Visually | - | |
Instruments are listed in order of use for : Notching Station :
| Sr.No. | Characteristic | Measuring Instrument / Gauge To Be Used | Instrument / Gauge Specification | |
| Range | Least Count | |||
| 3.1 | No. Of Pockets | Visual Counting | - | |
| 3.2 | Pocket Length | Digital Caliper with knife edge contacts | 0 –150 / 0 – 200 / 0 – 300 mm | 0.01 mm |
| 3.3 | Large End Pocket Width | Digital Caliper with knife edge contacts | 0 –150 / 0 – 200 / 0 – 300 mm | 0.01 mm |
| 3.4 | Small End Pocket Width | Digital Caliper with knife edge contacts | 0 –150 / 0 – 200 / 0 – 300 mm | 0.01 mm |
| 3.5 | Large End Flange Length / Top “G1†| Digital Caliper | 0 –150 / 0 – 200 / 0 – 300 mm | 0.01 mm |
| 3.6 | Small End Flange Length / Bottom “G2†| Comparator Stand | - | |
| Dial Indicator | 0 – 10 mm | 0.01 mm | ||
| Slip Gauge Box | Grade : 0 | |||
| 3.7 | Bottom Height Variation(Only For Ref.) | Comparator Stand | - | |
| Dial Indicator | 0 – 10 mm | 0.01 mm | ||
| Slip Gauge Box | Grade : 0 | |||
| 3.8 | Indexing Error / Bridge Width Variation | Bridge Width Variation Checking Gauge | Rajdhani Design | |
| Dial Indicator | 0 – 10 mm | 0.01 mm | ||
| 3.9 | O. D. Out Of Round | Spin Gauge | ||
| Dial Indicator | 0 – 10 mm | 0.01 mm | ||
| 3.10 | Taper At Extreme Corner Of S. E. Pocket | Comparator Stand | - | |
| Dial Indicator | 0 – 10 mm | 0.01 mm | ||
| Slip Gauge Box | Grade : 0 | |||
| 3.11 | Pocket Corner Radii (S.E. & L.E.) | Radius Gauge | 0 -5 mm in steps of 0.10mm | |
| 3.12 | Visual Checks | Visually with unaided eye | - | |
Instruments are listed in order of use for : Coining Station :
| Sr.No. | Characteristic | Measuring Instrument / Gauge To Be Used | Instrument / Gauge Specification | |
| Range | Least Count | |||
| 4.1 | No. Of Pockets | Visual Counting | - | |
| 4.2 | Wing Shake | Special Gauge | Rajdhani Design | |
| Set of Rollers with minimum radius at roller small end | Supplied by customer. | |||
| Ribless Cone supplied by customer | Customer Supplied. | |||
| Dial Indicator | 0 – 10 mm | 0.01 mm | ||
| Mandril | Rajdhani Design | |||
| 4.3 | Winging Angle at Roller midpoint(Only For Ref.) | Bevel Protractor | 0 – 360 º | 5’ |
| Surface Plate | Grade-0 | |||
| Master Roller | Roller of Master Bearing supplied by customer | |||
| 4.4 | Indexing Error / Bridge Width Variation | Bridge Width Variation Checking Gauge | Rajdhani Design | |
| Dial Indicator | 0 – 10 mm | 0.01 mm | ||
| 4.5 | Pocket Alignment | Visual with unaided eye | - | |
| 4.6 | Cup Height (Only For Ref.) | Comparator Stand | Rajdhani Design | |
| Dial Indicator | 0 – 10 mm | 0.01 mm | ||
| Slip Gauge Box | Grade-0 | |||
| 4.7 | Coining Pocket Length | Digital Vernier Caliper | 0 –150 / 0 – 200 / 0 – 300 mm | 0.01 mm |
| 4.8 | Cup Dia. At Top / Large End O.D. | Digital Vernier Caliper | 0 –150 / 0 – 200 / 0 – 300 mm | 0.01 mm |
| 4.9 | OD Out of Round | Spin Gauge | - | |
| Dial Indicator | 0 – 10 mm | 0.01 mm | ||
| 4.10 | Included Cage Angle | Bevel Protractor | 0 – 360 º | 5’ |
| Surface Plate | Grade-0 | |||
| 4.11 | Cage Stock Thickness | External Micrometer | 0-25 mm | 0.01 / 0.001 mm |
| 4.12 | Bottom Height Variation | Comparator Stand | - | |
| Dial Indicator | 0 – 10 mm | 0.01 mm | ||
| Slip Gauge Box | Grade : 0 | |||
| 4.13 | Visual Checks | Visually with unaided eye | - | |
Instruments are listed in order of use for : Spreading Station :
| Sr.No. | Characteristic | Measuring Instrument / Gauge To Be Used | Instrument / Gauge Specification | |
| Range | Least Count | |||
| 5.1 | Assembly Check | Set of Master Rollers | - | |
| ‘Go’ ‘No Go’ Spread Plug Gauge | Rajdhani Design | |||
| Cone | Supplier by customer | |||
| Assembly Pad | - | |||
| 5.2 | Bore Diameter | Digital Caliper with knife edge contacts | 0 –150 / 0 – 200 / 0 – 300 mm | 0.01 mm |
| 5.3 | Minimum Spread Pocket Length | Digital Caliper with knife edge contacts | 0 –150 / 0 – 200 / 0 – 300 mm | 0.01 mm |
| 5.4 | Bottom Height Variation | Comparator Stand | Rajdhani Design | |
| Dial Indicator | 0 – 10 mm | 0.01 mm | ||
| Slip Gauge Box | Grade : 0 | |||
| 5.5 | Visual Defects | Visual | - | |
